


What if your room fits the pool table, but not the game? Measuring for a pool table correctly means looking beyond the table’s footprint to the space needed to move a cue freely around it. A standard 58-inch cue calls for roughly five feet of clearance beyond each side of the playing surface. A doorway, column, or nearby piece of furniture can cut into that space.
It’s easy to focus on a table’s listed dimensions and assume you’re set. Comfortable play depends on the relationship between the playing surface, cue clearance, and everything else in the room. Measure those details before choosing a table so you can compare models against the space you actually have.
This room-by-room guide explains how to measure the table area, check clearance, and spot obstacles at floor level and overhead. You’ll learn how to compare a table’s footprint with its playing space, assess tight spots, and plan a practical layout. If your room serves more than one purpose, a pool-table dining top can also fit into the plan, but it doesn’t change the clearance needed for a game.
Key Takeaways
- Separate the table’s physical footprint from the surrounding space needed for comfortable play.
- Use a tape measure to record room dimensions and fixed obstacles in consistent units.
- When measuring for a pool table correctly, compare usable room space with the exact dimensions and clearance needs of each model.
- Check doors, furniture, columns, and overhead lighting for potential interference with shots or movement.
- If space is tight, consider a different placement, a smaller table, or a dining-top configuration while preserving playing clearance.
Measuring for a Pool Table Correctly Starts with Playable Space
Accurate measuring is manageable when you separate two things: the table’s footprint and the room needed to play. The footprint is the table’s physical size. Playable space includes the clearance around it for full cue strokes. A table can fit inside a room and still leave too little space for comfortable shots.
Playable clearance is the unobstructed area around a pool table that lets a player take a full cue stroke without hitting a wall or obstacle. It differs from the room’s overall dimensions, which are measured wall-to-wall. For an overview of how pool tables and their playing surfaces are described, see these billiard table dimensions.
What should you measure: the table or the playing area?
Measure both. Record the room’s usable length and width, then compare them with the specific table’s outside dimensions, measured rail-to-rail. Don’t assume tables of the same nominal size have identical outside measurements. Check the exact model specifications, then allow for cue movement beyond each rail. That distinction is central to measuring for a pool table correctly: the table footprint tells you what fits, while playable clearance tells you whether you can use it comfortably.
Why cue length changes the room you need
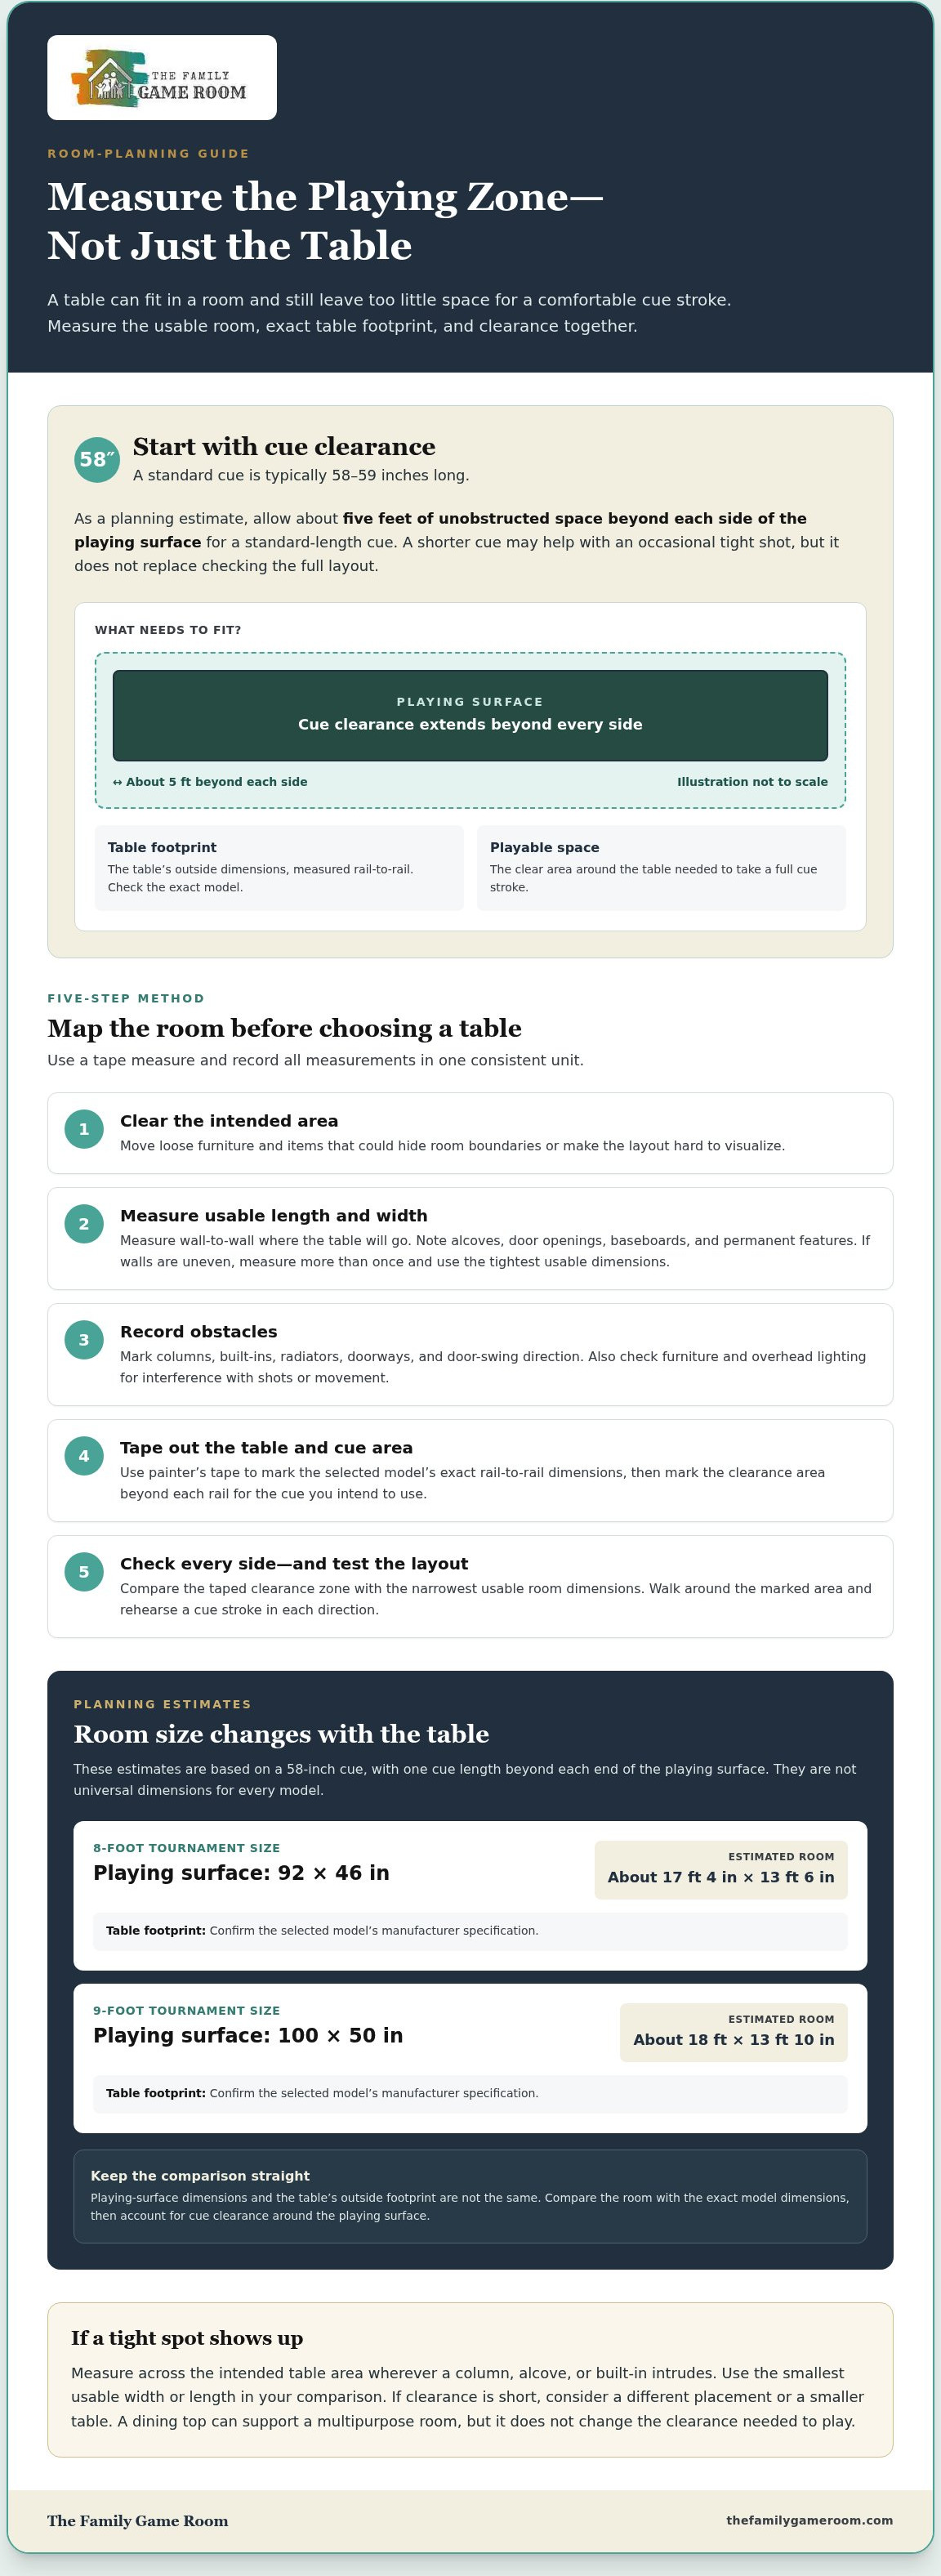
A standard pool cue is typically 58 to 59 inches long, so players need substantial open space around the table for a full stroke. As a planning estimate, allow about five feet of clearance beyond each side of the playing surface for a standard-length cue. A shorter cue may help with occasional tight shots, but it’s an accommodation, not a substitute for checking the full layout. Mark the table and clearance area on the floor before deciding.
For a first check, use consistent units and treat the playing surface as the starting point for cue clearance. The finished table’s rail-to-rail footprint may be larger, so use the model’s exact dimensions when judging its position in the room. A clear plan helps you assess the fit before the table becomes the room’s centerpiece.
How to Measure a Room for a Pool Table: A Step-by-Step Method
A reliable room plan starts with a tape measure, a clear floor, and measurements recorded in one consistent unit, such as inches. Follow the same sequence each time: clear the room, measure usable length and width, record fixed obstacles, mark the proposed table and cue area, then compare the clearances.
- Clear the intended area. Move loose furniture and items that could conceal the room’s boundaries. This makes it easier to measure and visualize the proposed placement.
- Measure the usable room dimensions. Measure wall-to-wall in both directions where you plan to place the table. Note alcoves, door openings, baseboards, and permanent features that reduce usable space. If the walls aren’t even, measure at more than one point and use the tightest usable dimensions in your comparison.
- Record fixed obstacles. Mark columns, built-ins, radiators, and other features that can’t be moved. Note doorways and the direction each door swings. An opening may provide access, but a door or frame can still intrude on the playing area.
- Mark the layout on the floor. Use painter’s tape to outline the proposed table using the exact model’s rail-to-rail dimensions. Then mark the cue-clearance area beyond each rail, based on the cue length you intend to use.
- Compare clearances on every side. Check the taped layout against the room’s narrowest usable dimensions. Look for places where walls, obstacles, or furniture intersect the clearance area. Colorado State University’s guide to required room sizes explains how table dimensions and cue length factor into room planning.
Measure the tight spots, not just the open floor
A room can look spacious from the doorway and still narrow near a column, alcove, or built-in. Measure across the intended table area wherever these features intrude, then use the smallest usable width or length in your comparison. Keep a simple sketch with each measurement labeled. This helps you distinguish a real clearance issue from a feature that sits outside the table and cue area.
Test the placement before choosing a table
Once the tape outlines are down, walk around the marked clearance zone and rehearse a cue stroke in each direction. If the space works, use your recorded dimensions to narrow the table options. Explore the American Heritage Billiards buying guide as you move from room planning to table selection, or browse pool table options for your game room.
Compare Pool Table Sizes, Cue Clearance, and Tight-Room Trade-Offs
A larger playing surface offers more room for the game, but it also demands more space for cue strokes. Compare playing-surface size and clearance first, then use the exact model’s manufacturer specifications to confirm its outside footprint. The figures below are planning estimates based on a 58-inch cue, not universal dimensions for every table.
| Table size | Playing surface | Exact model footprint | Estimated room dimensions | Cue-clearance assumption |
|---|---|---|---|---|
| 8-foot tournament size | 92 × 46 inches | Use the selected model’s manufacturer specification | About 17 ft 4 in × 13 ft 6 in | 58-inch cue, with one cue length beyond each end of the playing surface |
| 9-foot tournament size | 100 × 50 inches | Use the selected model’s manufacturer specification | About 18 ft × 13 ft 10 in | 58-inch cue, with one cue length beyond each end of the playing surface |
The playing-surface dimensions are standardized tournament specifications; the outside footprint varies by model. These estimated room dimensions add twice the cue length to each playing-surface dimension. Use them as a comparison aid, then check the actual table and room layout before deciding. Measuring for a pool table correctly means keeping these measurements distinct.
How to compare room charts without misreading them
Check what each chart measures: playing surface, outside table dimensions, or minimum room dimensions. Then confirm the table model and cue length used for its figures. A room estimate based on a shorter cue won’t provide the same clearance as one based on a 58-inch cue. Keep units consistent, and don’t combine a playing-surface measurement from one source with a footprint or clearance figure based on different assumptions.
What if your measurements are close to the minimum?
Identify the tightest sides and consider whether players can take ordinary shots from those positions. A shorter cue may help in a confined spot, but compare that compromise with choosing a smaller table. A borderline fit can limit some shots, so test the marked layout instead of assuming every angle will remain playable. A dining top makes the table useful between games, but it doesn’t reduce the clearance needed while playing.
Check Walls, Doors, Lighting, and Other Pool Table Obstacles
A clear floor plan can still hide a troublesome column, a door that swings into a cue path, or a light fixture positioned over a likely shot. When measuring for a pool table correctly, review the room at player level and overhead. Keep floor-space checks and ceiling checks separate, then bring both into one simple sketch.
Measure around fixed features and everyday furniture
For each fixed feature, note its position and distance from the proposed table edges. Include columns, fireplaces, cabinetry, radiators, and built-ins. A feature may sit outside the table footprint yet still block a cue stroke from a particular rail. Check doors in their fully open position, too, and trace a walking route into and through the room without relying on moving the table.
Plan around furniture as it normally sits. If a chair or side table will be moved before play, mark it as movable on the plan. Otherwise, include it as an obstacle. This gives you a realistic view of how the room works on game night, not just when it’s cleared for measuring.
Plan overhead space and game-room lighting
Measure ceiling height above the table area and note existing fixtures, beams, and ceiling fans. Don’t assume one mounting height works in every room. Fixture placement should light the playing surface without obstructing sightlines or interfering with a raised cue. For more guidance on positioning and choosing a billiard fixture, see the billiard lighting guide.
Make a quick sketch and label the table outline, each rail, fixed obstacles, door swings, furniture that stays in place, and walking paths. Add overhead features in a separate note or use a second view so ceiling details don’t get confused with floor measurements. For example, a column beside one corner may leave most of the room open while still limiting shots from that end. A clear sketch makes that pinch point easier to spot before choosing a table.
Before selecting a table, verify that every rail has usable cue clearance and that doors, fixtures, and everyday room features won’t interfere with play. Once your layout accounts for floor and overhead obstacles, explore pool tables for your measured space.
Choose a Pool Table That Fits Your Measured Room
Your room sketch and measurements can now narrow the choices. Compare the usable dimensions of the space with each candidate table’s exact manufacturer-listed footprint, then account for cue clearance using the cue length you expect to play with. Don’t rely on a general size label alone: outside dimensions can vary by model, and clearance changes with cue length.
Turn your measurements into a practical shortlist
Set aside any table whose verified footprint and playing clearance exceed the room’s usable space. For the remaining options, compare how comfortably players can move around the table and whether the layout leaves clear paths through the room. Keep your sketch beside the product specifications so you can check obstacles and tight sides as you review each model.
If a larger table leaves a narrow or awkward cue path, consider a smaller size or a different placement. You might also compare the layout using a shorter cue, but treat that as a trade-off: it may help in confined positions without making every shot as comfortable as it would be with your preferred cue. The right fit suits both your playing habits and the room.
Make room for both play and everyday living
A pool-table dining top can help a game room serve more than one purpose between games. It doesn’t reduce the table’s playing footprint or the cue clearance needed during play, so plan around the full playing layout before considering how the room will function at other times.
As you compare options, consider styles and finishes that suit your home alongside the measurements. The Family Game Room carries pool tables from American Heritage Billiards and Nixon Billiards, along with pool-table dining tops. Measuring for a pool table correctly gives you a practical starting point for comparing these options. Keep your dimensions handy as you browse, and choose a table that fits your room and the way you plan to enjoy it.
Explore pool tables for your game room
Plan Your Game Room with Confidence
Measuring for a pool table correctly means planning for more than the table itself. Compare the exact model footprint with your usable room dimensions, then allow enough cue clearance around every rail. Check doors, furniture, fixed features, and overhead lighting before settling on a placement. These steps help you choose a table that fits both the room and the way you want to play.
Keep your measurements and room sketch close as you browse. The Family Game Room offers pool tables from American Heritage Billiards and Nixon Billiards, plus pool-table dining tops for rooms that serve multiple purposes. A dining top adds flexibility between games, while the table still needs its full playing clearance. The Family Game Room serves customers across the United States with game-room tables and furnishings.
Explore pool tables for your game room and find an option that suits your measured space. Your next great game can start with a thoughtful plan.
Frequently Asked Questions
How do you measure a room for a pool table?
Measure the usable room length and width, then compare those dimensions with the table footprint and the clearance needed for cue strokes. Clear the intended area, use a tape measure, and record measurements in consistent units. Note obstacles such as columns, built-ins, and door swings. Mark the proposed table and clearance area on the floor with painter’s tape. This step-by-step approach makes measuring for a pool table correctly more manageable.
How much room do you need around a pool table?
Plan for about five feet of cue clearance beyond each side of the playing surface when using a standard 58-inch cue. This is a useful estimate, not a substitute for checking the specific table and room. A cue stroke may be restricted by a wall, column, or furniture even if the table fits. Compare the clearance needed on all sides, and use the tightest usable room dimensions for your layout.
Should you measure a pool table from the rails or the playing surface?
Use rail-to-rail dimensions to determine the table’s physical footprint, and use the playing-surface dimensions when estimating cue clearance. These measurements describe different things. Room dimensions are measured wall-to-wall, while the table itself occupies more space than its playing surface alone. Check the exact model specifications rather than relying only on a nominal table size, since outside dimensions can vary between models.
Can a pool table fit in a small room?
It may, depending on the room’s usable dimensions, table model, and preferred cue length. Compare a smaller table’s exact footprint and clearance needs with your measured space, and test the proposed placement with painter’s tape. A shorter cue can help with some tight shots, but it may not make every position comfortable. Check clearance around every rail before deciding that a compact layout will work for your play.
What happens if there is not enough cue clearance on one side?
Players may have to shorten or change their stroke, reposition for certain shots, or use a shorter cue in that area. That can limit playability, especially if the restricted side is needed for common shooting positions. Recheck whether a different table placement or a smaller table would improve the layout. Don’t assume a tight side is acceptable without marking the space and testing the cue path.
Do pool table dining tops change how much room the table needs?
No. A dining top can let the table serve another purpose between games, but it doesn’t reduce the clearance needed for play or change the table’s footprint. Plan for the full table and cue-stroke area first. Then consider whether a dining top suits the room’s everyday use. It’s a practical option for a multi-use space, provided the playing layout remains comfortable.
Do you need to account for a billiard light when measuring for a pool table?
Yes. Check ceiling height and note the position of light fixtures, beams, or ceiling fans above the planned table location. Treat these as overhead considerations separate from floor measurements. A poorly positioned fixture can interfere with sightlines or a raised cue, even when the table and floor clearance fit. Review the layout from above and at player level, and avoid assuming one mounting height suits every room.